How Do I Setup Email Client Access In CPanel?
To set up the email client access you’ll need to first have an existing email account created.
Step 1
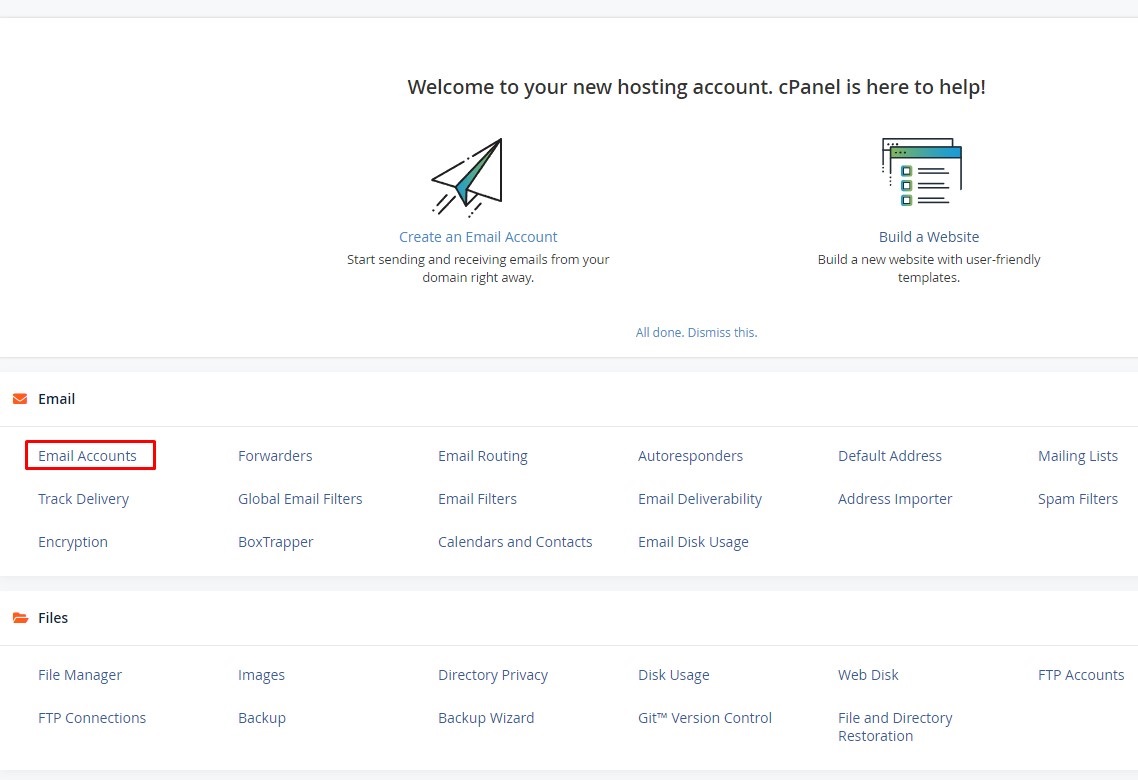
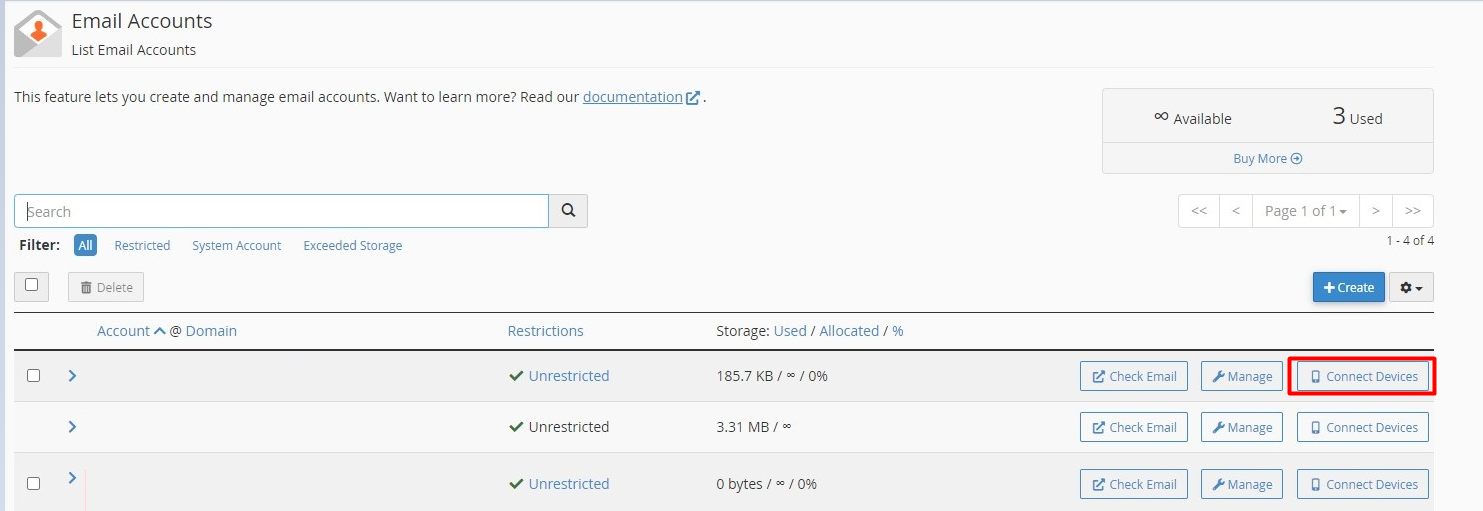
Make sure to select Email Accounts at the top and scroll down to the email account you wish to set up, click on Connect Devices
Step 2
Click on the Set Up Mail Client link from the drop-down

Step 3
Review the list of email Applications and choose the one you want by clicking on the Protocol link next to it

Step 4
The existing email client application must already be installed on your computer
If for some reason you have any issues with the auto-configuration here are the Manual Settings for you to follow:
| Secure SSL/TLS Settings
(Recommended) |
Non-SSL Settings
(NOT Recommended) |
| Username: [email protected]
Password: Use the email account’s password IMAP Port: 993 POP3 Port: 995 SMTP Port: 465 |
Username: [email protected]
Password: Use the email account’s password IMAP Port: 143 POP3 Port: 110 SMTP Port: 25 |

